Contents
App for Fitness Device in React Native: How to Develop Guide from Technical Lead
Published: April 22, 2024
38 min read


In this article, you'll learn:
1
⚙️ BLE Hardware Details
2
🛠 How to Setup Bluetooth/BLE in React Native
3
🗂 Major Fitness Protocols: Similarities & Differences
4
📱 Top Things to Keep in Mind when Enabling Multiple Protocol Support
5
✅ How to Process Workout Responses
6
🛑 Protocol-Related Issues
7
🔄 Reverse Engineering: Getting BLE Logs Based on the Existing Apps
8
🔧 To Sum Up: How to Create an App for Fitness Device in React Native?
9
👂 Takeaways
Today, more and more equipment for workouts has Bluetooth in place. Thus, you might be tempted to create an app to enable users to connect to those devices, track their progress, and control their fitness devices using a smartphone.
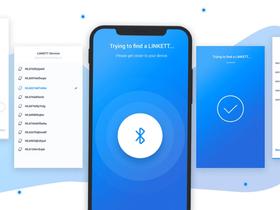
In this article, we’re going to take a look at how to start such a Bluetooth connection in a React Native fitness app, find out the differences between major protocols, the ways to identify the protocols & the device itself, and, of course, to control it. Then, we’ll discuss the potential pitfalls each protocol has and how we can overcome them. Lastly, we’ll show you how we created a fitness app in React Native for our client.
We’re not going to have all the code written in this article because it’d take hours to read, and the actual ways you overcome the pitfalls might differ, depending on your tech stack and personal wishes.
This is a detailed guide for all developers working on connecting fitness devices to the React Native workout app or simply willing to learn more. Even though we write our code in React Native, most of the article code should be platform-agnostic, so you can skip the React Native part and get to the protocols themselves.
⚙️ BLE Hardware Details
We've already described how Bluetooth works in our blog. Please take a look to revise your knowledge.
To keep it simple, we have a lot of different BLE devices. Each of them has unique services, descriptors, and characteristics to work with. Let’s take a closer look at this structure:
What byte array we send in, and how we parse the response — heavily depends on the exact device and protocol it works with.
🛠 How to Setup Bluetooth/BLE in React Native
Using this code above, on every screen you call useBleContext, active would be set to true, and all the scanning would process automatically. Once you leave this screen or go to another tab, active is set back to false, and no scanning happens.
🗂 Major Fitness Protocols: Similarities & Differences
You can treat protocol as a special language for communicating between your complete React Native fitness app and BLE device. It determines a few things:
- What you can do with the device.
- How you can accomplish your goals.
- Characteristics you’ll need to work with.
- When we need to send commands (basically call
.write()with some data).
In our guide, we'll talk about 3 different protocols used when working with fitness devices:
Let’s first talk about each of them in general, and then learn how we can seamlessly build them into the React Native workout app, avoiding extra pitfalls and headaches.
FTMS Protocol
FTMS Protocol seems to be a protocol with the biggest number of available features. Here are some of the most important ones:
When using this protocol, we don’t have any characteristics to read and have 1 to subscribe to notifications.
Workout notification is sent only when we send the write command, just like in Delightech. Basically, instead of subscribing to a real notification, we ping our BLE device every second.
Value parsing also works the same way as Delightech: instead of shifting our values, depending on the first bytes, we ALWAYS expect them in the same positions. For instance, if we expect calories, they'll always be sent as the 6th byte, not taking a look at whether we have distanceб speed or any other field.
Yet, there are a few differences worth mentioning:
-
As you remember, we send 2 requests, and we receive 2 notifications regarding the workout. They're prefixed with different bytes. For instance, we'll always have
speedif the notification is prefixed with[0x02, 0x42, 0x02]. No need to look at the specific bits. -
We can't know the exact device. And the exact device doesn't change the response we receive.
To sum up:
- We need to be able to write() to the same(fff2) characteristic a few times a second while the workout is in progress. Also, we have quite a few other occasions where we call this characteristic.
- We don’t
.read()from any fields. - We need to subscribe to a single characteristic, and every time we trigger
.write()to receive a notification. We don't shift any values, but read them, depending on a few first bytes.
📱 Top Things to Keep in Mind when Enabling Multiple Protocol Support
Since now we know key points about each of the protocols, we want to make our fitness app React Native efficiently work with any of them. To make it happen, we need to work on a few crucial things:
- We need to understand what kind of protocol we work with right now.
- We can't understand it by device's name (because each manufacturer might come up with its own name).
- We can't rely on users knowing the protocol. 99.9% of the users don't know their protocol, and the app shouldn't break if the user misclicks.
- Therefore, we should somehow understand the protocol ourselves.
-
We need to send specific write commands in specific situations, attaching maybe dynamic values (for instance, resistance, weight, or something else). These commands are mostly different for each protocol.
-
We need to parse the response and correctly understand what exactly our device has sent to us. It depends on the protocol because the responses have nothing in common.
Let’s take a closer look at these steps!
Step 1: Understanding what protocol we work with
Each protocol has something unique, which could help us highlight it among the devices.
- FTMS Protocol
The protocol uses very unique identifiers. For instance, its bike- or rower-specific identifiers aren’t used anywhere else. Thus, if we receive a notification from a characteristic or read a characteristic with some FTMS identifiers — we can be sure it's FTMS.
- Delightech & Yeekang/Fitshow/Thinkfit
Both of these protocols use the same identifier. Moreover, this UUID (fff1) is widely used among other Bluetooth devices. Since we can't rely on the identifier itself, we should look at the value we receive — protocols’ responses are always prefixed with the same fields.
We can then basically write a protocol interface and basic implementation:
At this point, we have everything we need to work with different devices. We learned how to:
- send data to all the possible protocols;
- based on the response, understand what protocol we work with;
- correctly send data to the protocol we work with.
For now, there’s one last piece left to make it work (except for UI, state management, and all the unnecessary things 😉). Let’s figure out how to correctly process the workout response!
✅ How to Process Workout Responses
First of all, let's agree on our goals. The idea of this article is to teach you:
- Receive a notification with the workout data — done ✅
- Parse notification with workout data (burned calories, distance, speed, RPM, heart rate) — we're here 🙂
- Store the workout data somewhere and maybe show the UI changes to the user.
Here we introduce 2 new functions — getNewDeviceField and getNewValue. We use them to:
- return the updated device field;
- understand what matchRule to use;
- make all the necessary math to find the value.
At this point, I think we have everything to make sure we are building a fitness app React Native that correctly processes all the protocols, saves the values, understands the protocols, and has no issues adding another protocol as it won’t change any line of the code. In fact, we could even bring the protocols to some outer API and load it on demand to lower our app bundle.
Still, there are quite a few protocol-related issues, which we'll briefly discuss in the next part.
🛑 Protocol-Related Issues
Delightech
- When you disconnect the device from your React Native fitness app — the device turns off. Yet, even though the device triggers all the "disconnect" events inside our code, it still has Bluetooth turned on for around 7 seconds. Moreover, the device behaves with our Bluetooth as if it was turned on — it means that it's again available for scanning. Default behavior would be as follows: we connect the device, disconnect it, receive the listener's calls, and then get notified once again that the device is available.
However, the disconnection process is already in progress. It means that the device will anyway NOT respond to our calls and won’t let us know it's off. Instead, we'll just behave with the device as if it's turned on, meanwhile it's not. The solution here is to have a delay between disconnecting and accepting the same scanned device.
- It’s a normal thing for many users to pause a workout. During the pause, all the values are sent as 0. So when we resume the workout, it goes back from 0. It means that if we were working out for some time, for example, rode 1 km and then paused, after resuming we'll have 0 in the account.
The solution here is to catch the paused behavior and store the values which need to be added up in a special state. Later on, we sum up the values before and after the pause. You can add a custom isAccumulative field to DeviceField to make it reusable.
- Don't send too many write requests to receive more real-time updates. If you send requests more often than once a second — your device will end up disconnected. One second is a preferred interval.
FTMS Protocol
-
You can automatically detect if the workout is paused. When the workout is paused, all the data is passed as 0. However, if in case of Delightech, when the workout resumes it stays at 0 and increases over time, for FTMS it’s brought back to the initial value when unpaused. It means that you should avoid these 0 values only when paused. As always, you can add an additional field to
DeviceField. -
Even though we have a separate characteristic for each device type, not all the manufacturers follow this rule. You might have a few notifications from different characteristics within one device. For instance, if you exercise on a bike, you might receive values from bike, rower, and cross-trainer characteristics.
-
FTMS doc doesn't really share the characteristic UUID with us. You can take a look at them here.
You can, later on, go through the logs using Wireshark and understand all the Bluetooth commands you need to send and receive. You need to have a fitness machine for that and an Android device (not available on iOS).
In case you don't have either of that, we would be glad to share with you a list of our logs here.
🔧 To Sum Up: How to Create an App for Fitness Device in React Native?
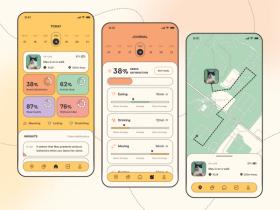
Now, we'd like to explain how our developers apply these skills in practice. So, we’ll share our expertise in making a complete React Native fitness app for SportPlus. Recognizing the growing demand among customers to connect their equipment to mobile devices, the client tasked us with the creation of an app compatible with a variety of fitness devices.
Testing was crucial in SportPlus app development, like any other fitness app with connection equipment to mobile devices. Apart from confirming functionality, we prioritized ensuring Data Accuracy and Security. The data collected and displayed in the application (e.g., step count, calories burned, heart rate) must be accurate and reliable. Also, such apps often store users' personal data, such as name, address, physical metrics, health information, etc, so that's why we needed to identify potential vulnerabilities and ensure appropriate data protection measures are in place.
As a result, SportPlus has a user-friendly fitness app, and we’ve got one more happy client. So, with careful planning and diligent execution, any development team can create a complete React Native fitness app that resonates with users and drives business growth.
👂 Takeaways
As you see, React Native offers a powerful and efficient way to develop fitness mobile applications for BLE devices that work seamlessly across iOS and Android. Let’s summarize the key takeaways:
- The recommended solution for connecting a React Native app to a BLE device is using react-native-ble-plx. To manage Bluetooth permissions, scanning, and navigation between screens, you should use a separate class, with a helper hook wrapping it for state updates.
- Each protocol — FTMS, Delightech, and Yeekang / Fitshow / Thinkfit — acts as a specialized language for app-device communication. While FTMS offers extensive features, Delightech simplifies with single-characteristic operations, and Yeekang/Fitshow/Thinkfit ensures consistent parsing.
- Handling multiple protocols requires understanding unique identifiers, defining write commands, and employing parsing strategies. Notably, Delightech devices need a disconnect delay, FTMS protocols may reset values during pauses, and caution is advised with Yeekang / Fitshow / Thinkfit write requests.
- Implementing a generic protocol handler may offer a streamlined approach, promoting flexibility, adaptability, and scalability across various protocols.
By understanding the core concepts of Bluetooth communication and integrating with relevant fitness device protocols, you can build a feature-rich React Native fitness app.
If you’re looking for a Tech Partner to integrate your application with a fitness device of your choice, drop us a line and we’ll see how we can help you!
Was it helpful?
Questions you may have
Take a look at how we solve challenges to meet project requirements
How do you ensure code quality and maintainability in React Native projects?
We ensure code quality and maintainability in React Native projects through regular code reviews, automated testing, adherence to coding standards, and modular architecture design. Continuous integration and deployment pipelines also help maintain code quality by catching issues early and ensuring consistency across the codebase.
How do you approach cross-platform compatibility issues in React Native apps?
Cross-platform compatibility in React Native apps is achieved by utilizing platform-specific modules and APIs when necessary, employing responsive design principles, and testing on various devices and operating systems. Additionally, we rely on libraries like React Native Elements and React Native Paper to provide components that adapt to different platforms.
Can you explain your experience integrating third-party services and APIs into React Native apps?
Integrating third-party services and APIs into React Native apps involves thorough research, understanding API documentation, and utilizing community-supported packages. We prioritize well-documented and well-supported APIs, ensure secure authentication mechanisms, and implement error handling and fallback strategies for robust integration.
Can you suggest any features that could give our app a competitive edge in the current fitness app market?
We recommend incorporating features like personalized workout recommendations, social sharing functionalities for community engagement, and gamification elements such as challenges and rewards. Seamless integration with different BLE devices for comprehensive tracking will also help you stay ahead of the curve.
How do you ensure a seamless user experience across devices and operating systems?
We meticulously follow platform-specific design guidelines and optimize performance through efficient rendering techniques and caching strategies. Extensive testing across a myriad of devices and OS versions ensures that our app performs flawlessly regardless of the user's setup.
How do you ensure the app complies with data protection laws (such as GDPR or HIPAA) relevant to the fitness industry?
We prioritize robust data encryption and security measures to safeguard user information. Obtaining explicit user consent for data collection and processing is a cornerstone of our privacy practices. Regular audits and updates to the privacy policies ensure ongoing compliance with stringent data protection laws such as GDPR and HIPAA.
Can you discuss your experience with implementing secure payment processes for in-app purchases?
Implementing secure payment processes for in-app purchases entails utilizing trusted payment gateways, encrypting sensitive user data during transactions, and adhering to PCI DSS standards for handling payment information. Additionally, implementing two-factor authentication and fraud detection mechanisms adds an extra layer of security.


Read also


React Native: a Comprehensive Guide for Startups


What to Consider when Integrating BLE in your React Native App


How to Integrate BLE-Based Fitness Devices into your App


Bluetooth Low Energy: The Ultimate Guide on BLE From CTO

How to Develop a Companion App for Smart IoT Devices


18 Essential Tools For React Native Development
Our clients say

![Stormotion client David Lesser, CEO from [object Object]](/static/93e047dadd367691c604d8ffd1f54b58/1b3aa/david.webp)
They were a delight to work with. And they delivered the product we wanted. Stormotion fostered an enjoyable work atmosphere and focused on delivering a bug-free solution.
David Lesser, CEO
Numina