Contents
How to Update Your App for iPhone X
Published: November 8, 2023
6 min read


In this article, you'll learn:
1
📲 Changes to Storyboards
2
🤳 Safe Area Layout Guide
3
💻 Safe Area Insets
4
🔋 Status Bar
5
👨💻 Navigation Bar
6
🔎 Search Controller
7
📱 Launch Images
8
💡 Conclusion
It’s impossible to deny that Apple Special Event became the most awaited annual event in the mobile world. Of course, it would be even more thrilling if we hadn’t almost 100% accurate rumors ahead of time. Yet, anyway, new products still amaze and excite us. And that’s why we love Apple!
Last year the company presented many great products including iPhone 8 and iPhone 8 Plus, Apple TV 4K, Apple Watch Series. However, the headliner of the event was iPhone X. Undoubtedly, the most eye-catching device’s feature is a brand new design with an edge-to-edge screen.


iPhone X mockup (image by Sandor)
Yet, while for users it is a new fascinating experience, for developers it turned out to be a tough task. Or — let’s not be too pessimistic — a tricky challenge. Here’s what I’m talking about:
- The notch at the top of the screen that partly overlays the display.
- Extended screen size since iPhone X doesn’t have the Home Button anymore.
- Hidden Home Indicator at the bottom of the screen that also should be considered during UI development.
However, there is always a way out 😊
Together with our iOS developer Daniil Tyshchenko we decided to share with you several useful tips on updating your app for iPhone X. Let’s get it started!
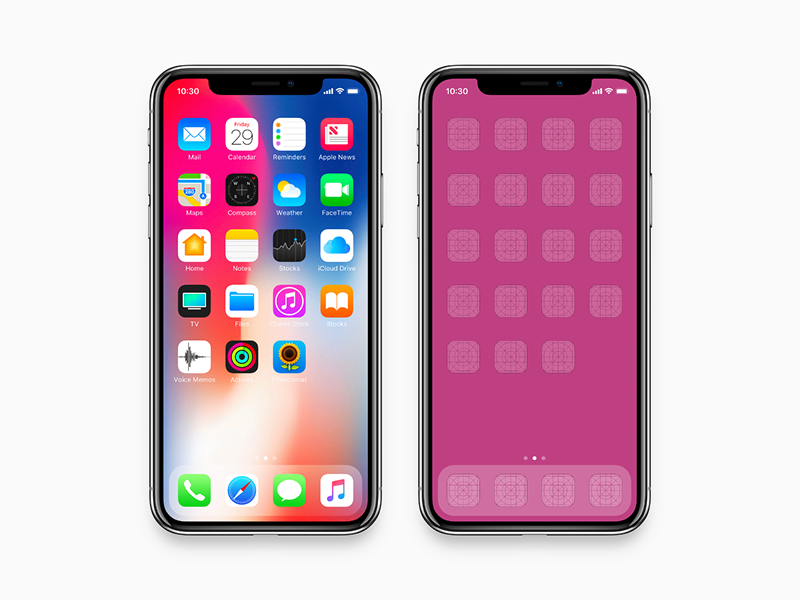
📲 Changes to Storyboards
Since iPhone X has a bit different screen design, old-school storyboards may not work as well as they used to. When developing a mobile app for this device, you should take into account following points:
- The home button is missing and the screen is extended to the very bottom. Yet, you have to consider the home indicator when developing UI.
- Top and bottom layout guides in their common sense are missing too. Instead of them, the “safe area” concept is used for iPhone X.
- Also, you have to pay attention to the notch at the very top.
Note: if your app works only in the portrait mode, top and bottom layout guides are still applicable. Yet, we strongly recommend to avoid them and work with the safe area instead.
How to reflect it in your storyboards?
- Open Xcode 9.
- Enable the option “Use Safe Area Layout Guides” in the File Inspector Panel.


- Every time when constraints are attached to screen borders, you use SafeArea instead of View.


- Profit! Storyboard will do the rest of the work for you.
🤳 Safe Area Layout Guide
Starting from iOS 11 UIView has only one property — safeAreaLayoutGuide. This property replaced well-known topLayoutGuide and bottomLayoutGuide. When creating apps for iPhone X, it’s deprecated to use old properties so try to use the new one instead.


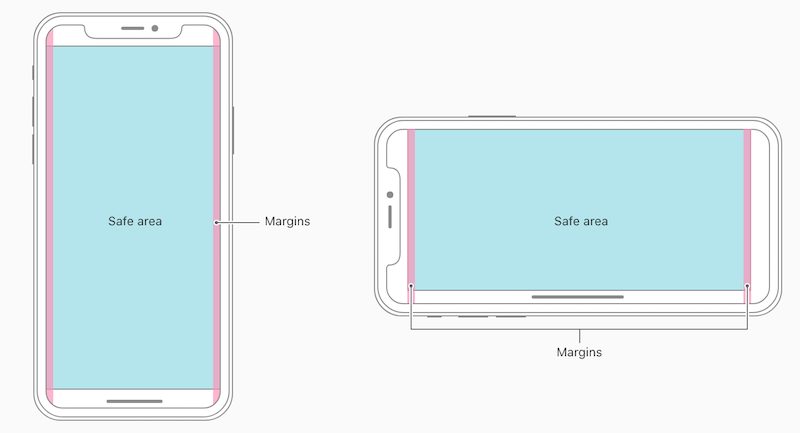
Safe Area for iPhone X
However, safeAreaLayoutGuide is supported only starting from iOS 11. Thus, there are 2 options when updating your app for iOS 11:
- If your application is available for devices with iOS 11 or newer, you can just code it like this:
- But if you support iOS 10 and older versions, you can’t avoid using top/bottomLayoutGuide. In this case the perfect solution for you is the one below:
- Then the piece of code mentioned above will look like this:
It’s worth mentioning that every UIView has safeAreaLayoutGuide and as it is written in the Apple documentation:
“For the view controller's root view, the layout guide accommodates the status bar, other visible bars, and any additional insets that you specified using the additionalSafeAreaInsets property of your view controller. For other views in the view hierarchy, the layout guide reflects only the portion of the view that is covered by other content. For example, if a view is entirely within the safe area of its superview, the layout guide edges are equal to the edges of the view.”
The same is true for the next paragraph as well.
The key idea: always try to use this property to prevent overlapping of status bar, home indicator and so on with your views and actions.
💻 Safe Area Insets
This property is useful when working with events that need to be processed dynamically.
An important point here is that in the usual UIViewController's lifecycle this property can still be (0, 0, 0, 0). So if you have any subviews that are based on values of this property, all the changes must be processed inside the following UIViewController's method — viewSafeAreaInsetsDidChange.
As safeAreaLayoutGuide, this property is also available starting only with iOS 11. Therefore, if you want to keep compatibility with earlier versions, we recommend using the following snippet:
🔋 Status Bar
The idea behind this point is simple as that: don’t use any magic hardcoded numbers (like 20 in the case with the Status Bar).


Status Bar in iPhone X
If you need to find out the height of the status bar for any reason, we can offer you this workflow:
👨💻 Navigation Bar
Avoid hardcoded numbers here as well. Specifically, don’t use the value 44 (or 64, if together with the Status Bar) since the Navigation Bar can have different height. When? There are plenty of possible options. For example, in the Landscape mode, or when it has searchController or supports “large title” etc.


Navigation and Status Bar in iPhone X
By the way, the same is true for the Status Bar.
We strongly recommend to use Auto Layout together with SafeArea so as not to overlap the Navigation Bar. Yet, if you still need to know the height of the Nav Bar, you can do it like that:
🔎 Search Controller
With the release of iOS 11 Apple added a new property — searchController — to the Navigation Bar. Now if you use the SearchBar with TableView and want to make it look good on iPhone X, you should use this new property.
Yet, as you might have already guessed, searchController is also available starting from iOS 11. Therefore, your code should look as follows:
📱 Launch Images
If for any reason you use Launch Images, then most likely you don’t have an icon for iPhone X. To fix this, you should:
Select Assets.xcassets, right click on middle pane, select App Icons & launch Images -> New iOS Launch Image. Then move the old LaunchImage.launchimage images to the new one, and add the image size with 1125×2436 px for the iPhoneX.
💡 Conclusion
These were the most significant changes that affected adaptation for iPhone X. Consider them when creating a mobile app for this device and then everything should go smoothly!
We hope this article was useful. Any questions left about iPhone X update? Just hit the button below and we’ll be there to help.
Was it helpful?


Read also


How to Make your React Native Application Accessible to ALL, not just to MANY


Which Payment Providers should I use for my SaaS Product?


What makes React the best option for SaaS Apps?
Our clients say

![Stormotion client Alexander Wolff, CPO from [object Object]](/static/a16ba3c9580effc3ab9a68d115eadffe/1b3aa/alex.webp)
When I was working with Stormotion, I forgot they were an external agency. They put such effort into my product it might as well have been their own. I’ve never worked with such a client-focused company before.
Alexander Wolff, CPO
Sjut